
Windows offers a setting named Dark Mode that applies a dark theme to apps you get from the Windows Store. It doesn’t affect most desktop apps, or tools like File Explorer, but we’ve got some other solutions for those. Here’s how to get your whole desktop (or as much as possible) looking dark.
Enable Dark Mode for Windows 10 Settings and Apps
To enable Dark Mode, head to Settings > Personalization > Colors. Scroll down and select the “Dark” option under the “Choose your app mode” section.
The Settings application itself immediately turns dark, as will many other “Universal Windows Platform” applications (those you get from the Windows Store). However, it’s up to each developer to support Dark Mode, and many do not. And, as we mentioned before, this option doesn’t affect most desktop applications, including Windows 10’s File Explorer. Those remain white. A few desktop applications, including Paint.NET, do respect this setting—but most don’t.

Enable Dark Mode in Microsoft Edge
The Microsoft Edge web browser included with Windows 10 also has a dark theme. However, its dark theme option is entirely separate from the Dark Mode option in Settings…for some reason.
To activate the dark theme in Edge, click the settings button on the toolbar (the icon with three dots at the far right side), and then select the “Settings” option. In the “Choose A Theme” dropdown menu, choose the “Dark” option.

Note that the title bar, toolbars, and menus for Edge turn dark, but web pages themselves remain unaffected.
You can also set your theme separately in the Groove music player and Movies & TV video player apps. However, they’ll just use your system theme setting by default. You don’t have to change the setting manually, as you do with Edge.
Enable the Dark Theme in Microsoft Office
Microsoft Office 2016 also contains a dark theme that isn’t enabled by default, and must be manually enabled.
To do so, open an Office application like Word or Excel and head to File > Options. On the “General” tab, look for the click the “Personalize your copy of Microsoft Office” section and set the “Office Theme” dropdown there to the “Black” option.

Your theme choice applies to all Office applications. So, if you set this option in Word and later open Excel, Excel should also use a dark theme.
Install Dark Themes for Chrome, Firefox, and Other Applications
Many other Windows desktop applications have their own theming options and theming engines. For example, to use a dark theme in Google Chrome, you’ll need to head to Google’s Chrome themes site and install a dark theme. For Firefox, you’ll need to head to Mozilla’s Firefox themes site and install a dark theme.
For example, we installed the Morpheon Dark theme for Chrome. It makes Chrome look much more at home on a dark-themed desktop.

You’ll have to check to see whether the applications you frequently use offer their own theme options.
Enable a Dark Theme for Windows Desktop Applications
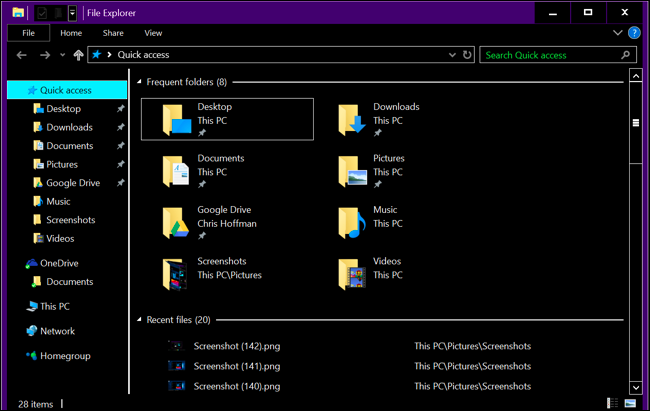
The real problem with the new Dark Mode setting is that it doesn’t affect the Windows desktop theme at all. Desktop applications like File Explorer continue using the normal, light theme.
Windows does have a built-in dark theme for desktop applications, but it probably isn’t ideal. To enable it, head to Settings > Ease of Access > Color & High Contrast. On the right, scroll down to the “High Contrast” section and set the “Choose a Theme” dropdown to the “High Contrast Black” setting. Click “Apply” to save the setting.

Setting this high contrast theme makes applications like File Explorer show a dark background. However, they don’t look all that great. High contrast themes are an accessibility feature designed to increase contrast so the screen is easier to read and understand. They don’t look nearly as slick as a modern dark theme would.
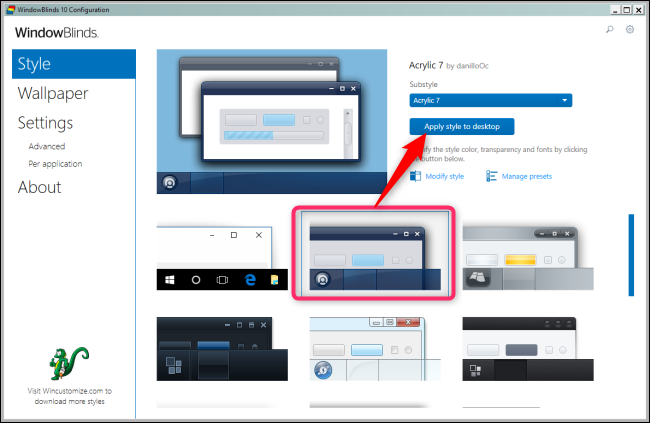
If you want a slicker dark theme for File Explorer and other desktop applications, you’ll have to resort to a third-party app. While there are a few out there, we’re big fans of WindowBlinds from Stardock (the same people that make apps like Fences and Start10). The app costs $9.99, but there’s a free 30-day trial so you can see if it’s right for you.
And the nice part is, when you apply a theme in WindowBlinds, it applies to everything—UWP apps, desktop apps, dialog boxes, you name it.
After installing it, fire it up and head to the “Style” tab. To apply a theme, just select the one you want, and then click the “Apply Style To Desktop” button.
WindowBlinds doesn’t have a built-in dark theme (though some built-in themes are darker than others). You can always create your own by clicking the “Modify Style” link under any theme. You can adjust pretty much anything you can think of there. But, there’s an easier way.
Just head to the WindowBlinds section of the WinCustomize site. There, you’ll find all kinds of WindowBlinds-compatible skins you can download. After downloading one, double-click the file and the theme is added to the “Style” tab in WindowsBlinds, so you can apply it (or customize it) from there.
Here’s a shot of File Explorer with the Dark Mode skin (our favorite of the various dark themes on the site) applied through WindowBlinds:
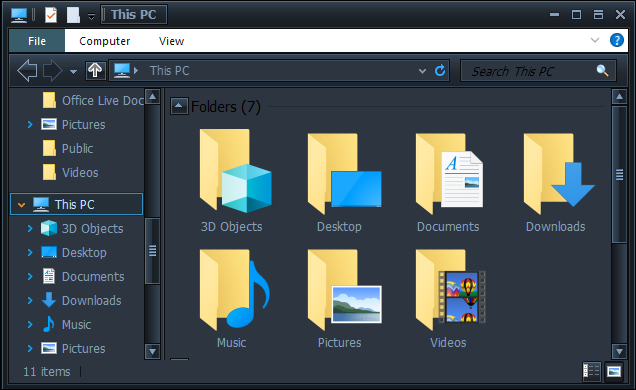
Not bad, right? And with a little tweaking, you could make it look just the way you want.
Comments
Post a Comment